If you are currently working for a company as an iOS developer, chances are you might need prepare your app to be run on different environments (e.g. Development, Testing and Production). Different environments will usually run on a different set of data such as the initial setting data or more specifically the API URL might be different.
One of the best ways to handle this situation is to create multiple targets in your project .
1. Duplicate Target
Navigate to your .xcodeproj file, right click on your target and select “Duplicate”
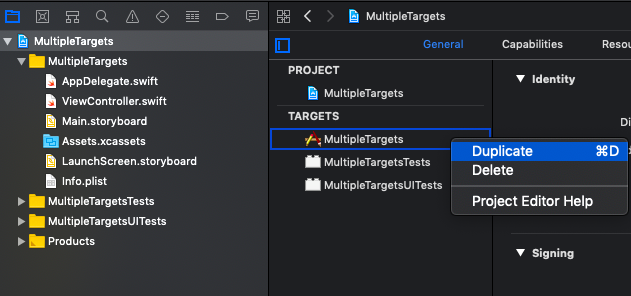
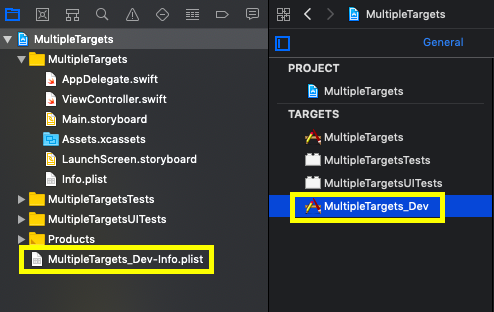
Once you’ve done that, you can see the new target has been created together with an associated Info.plist file
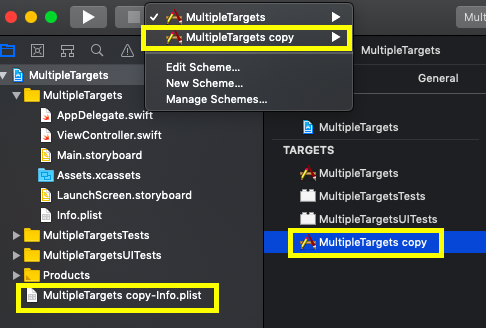
2. Change the names
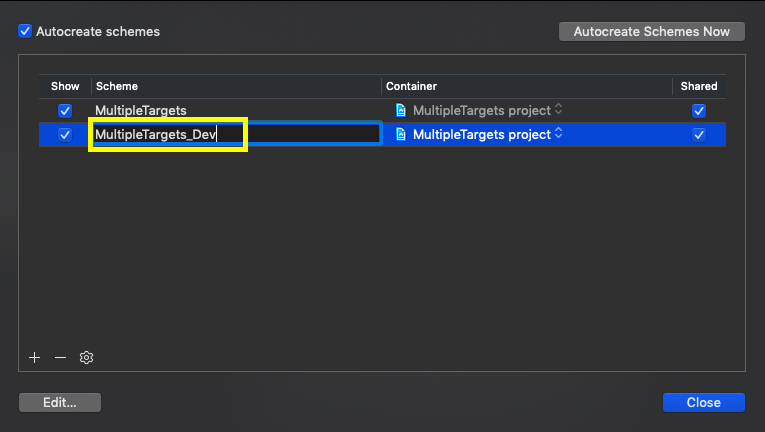
We will need to first rename the scheme by tapping on the “Manage Schemes…” option.

Tap on the scheme name and change to a name that best represent your environment. In this case, I will just put “MultipleTargets_Dev” which basically means a target that’s meant for Development environment.
Next, change the name of both the newly created Target and info.plist file to the same name as well which is “MultipleTargets_Dev” in this case.
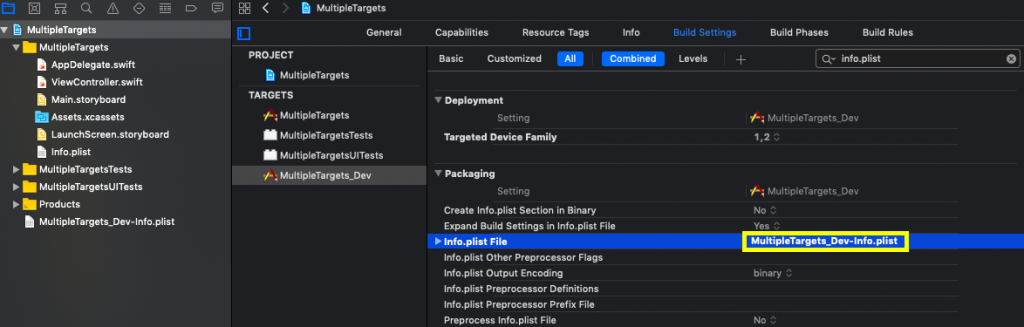
After you’ve changed the name of the info.plist file for the newly created Target, you need to also make sure that you have updated the “Info.plist File” property in the .xcodeproj file as shown below.
Note: Make sure the new target is being selected (“MultipleTargets_Dev” in this case) upon changing the name for Info.plist file property
3. Add Compiler Flag
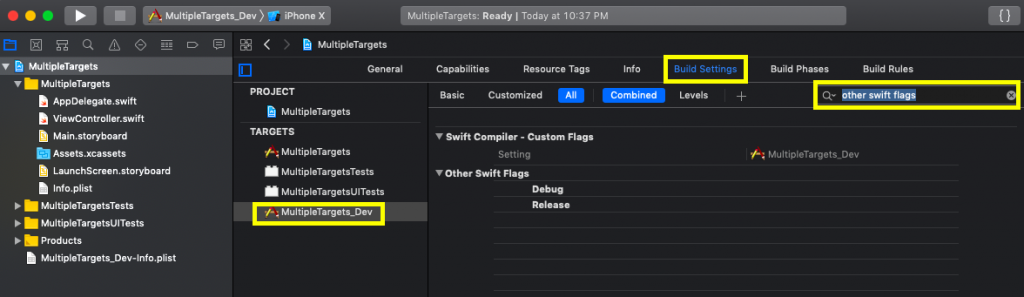
Navigate to your .xcodeproj file, select the newly created Target (“MultipleTargets_Dev” in this case), select “Build Settings” and search for “other swift flags”.
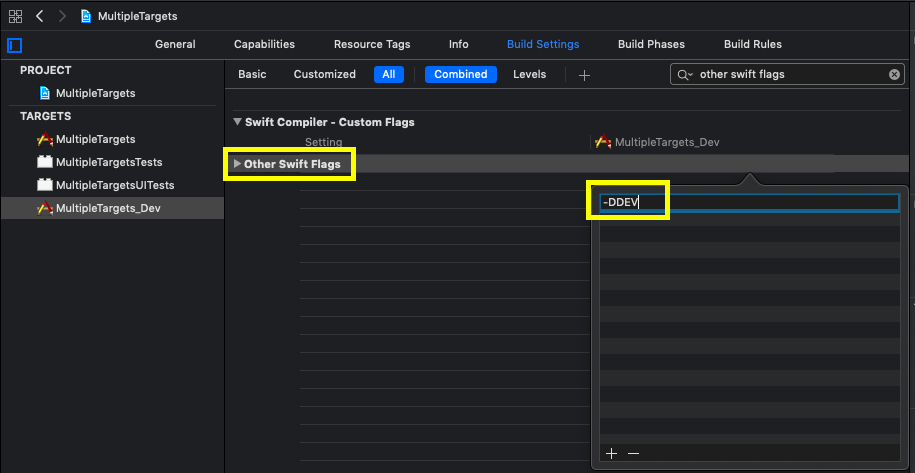
In the “Other Swift Flags” section, add the name that best represent this particular targets / environment. In this case, I’m going to set the name as “-DDEV”
Note: It’s mandatory to include “-D” as a prefix for Custom / Swift Flags.
4. Time to Code
That’s it! All that’s left to do is to write the code based on the format below and you should be able to run certain codes depending on the selected scheme during run time.
Note: There’s no need to include the prefix “-D” for the Custom / Swift Flag in the source code.
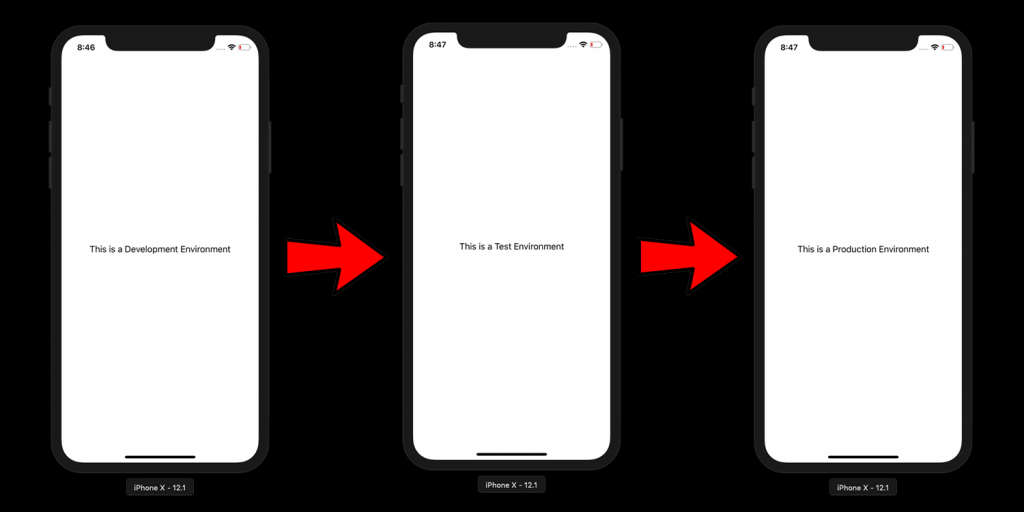
#if DEV
      self.nameLabel.text = "This is a Development Environment"
#elseif TEST
      self.nameLabel.text = "This is a Test Environment"
#else
      self.nameLabel.text = "This is a Production Environment"
#endif